


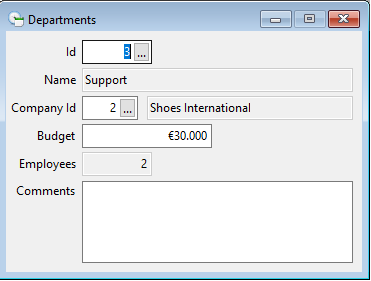
Selection lists, sometimes called lookup lists, offer the end user a convenient way to pick an existing record from a table. As I showed at the end of the previous lesson, you can have a prompt button in a key field data entry object. Or in Web it shows as a magnifying glass.
After clicking on the prompt, a list of records of the table is shown, from which one record can be selected. In Windows, this is a modal dialog. In a web drill-down style application, it goes one level deeper. So the user must make a choice or click cancel. After that, the selected record is returned into the previous screen.
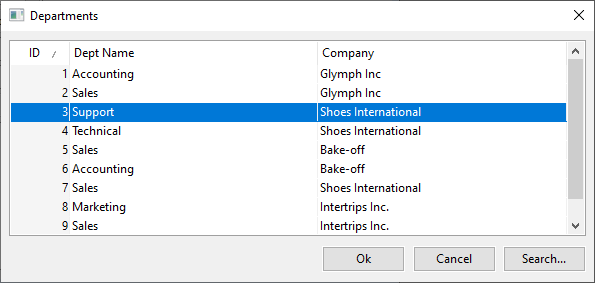
This selection list has a short loading time and can be sorted on indexed columns, but not by default on other columns. For SQL environments, you could make sorting on other columns possible by creating client side indexes, by the way.
Win/Web Lookup Object
Now, how do you build this? And why is it relevant to Data Dictionaries? Well, it is in the Data Dictionary where you can connect the table column to the selection list, or Lookup Object, as it is called here.
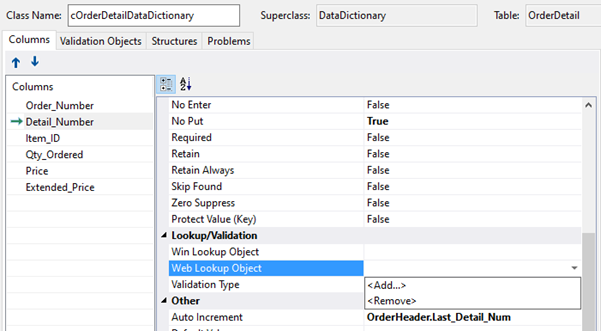
Just click the column, and in the section Lookup slash Validation, you can find an option for Win Lookup Object and Web Lookup Object. Choose the one that is relevant for your application and then in the dropdown you click to Add the selection list and then Browse the AppSrc folder for the right file.
Create the Lookup object
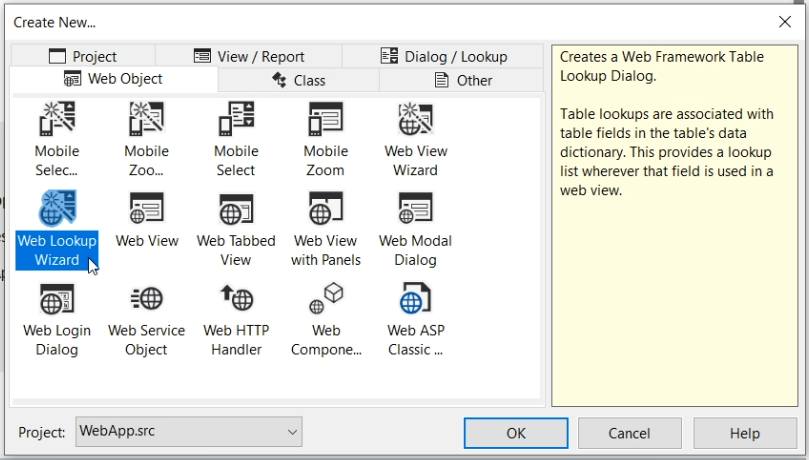
However, we have not created a selection list yet. So let’s do that first. You can create it via a wizard or via a template. I will show an example using a wizard, based on the WebOrder example application. This is a Desktop style web application, which supports the web lookup. If you would work on a drill-down type application, like the Web Order Mobile example, you’d have to create a Web mobile select view.
Video example:
This is the WebOrder example application. In the Studio menu I go to File, New, Dialog/Lookup. Here you can either select Lookup Wizard or Table lookup. The first results in a fully functional selection list, the latter needs further programming. However, both are for Windows applications and this is a web application, so I go to the Web Object tab page and select the Web Lookup Wizard. Click Next.
I want a selection list for order detail. Because, what I want to do is create a screen where a complaint can be made about an item of an order. So I want to create a prompt button for selecting a specific Order Detail record of an already selected Order Header record.
I accept the suggested names and description. Now select the columns I want to show in the selection list.
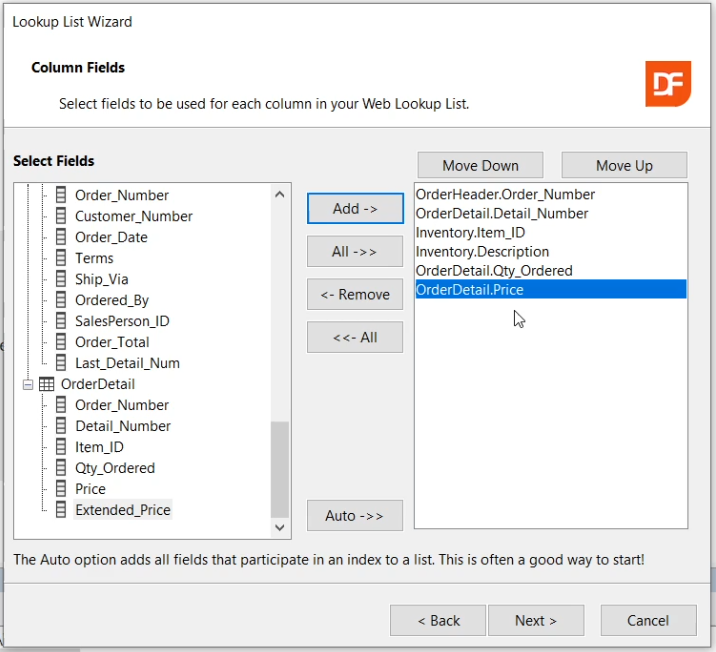
Since this table has a number of foreign key columns, and the parent tables too, this is a long list. I click this “Auto” button, which gives me a good start. I want the product ItemID and the name of the product, which is the Description of the Inventory Item. Add quantity and price. Next. I leave this as is and look at a preview. Looks good to me. Next.
Here you can indicate which fields should get a prompt in their DEO. I only want that for Order_Detail. Click Finish.
Here is the code of the generated lookup object.
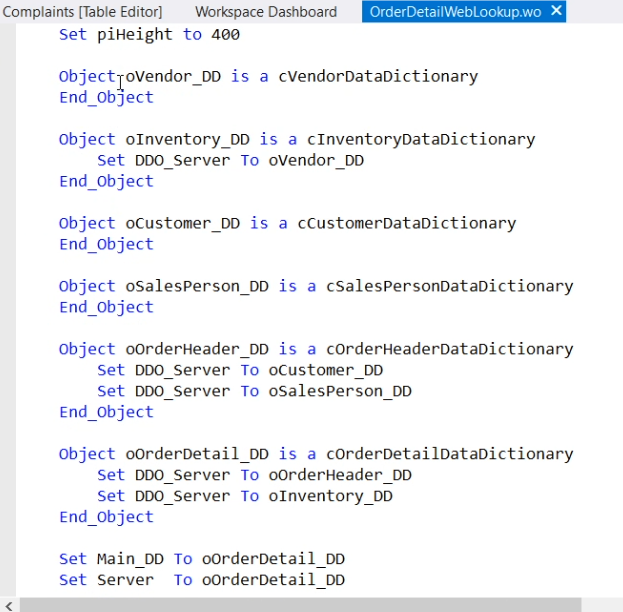
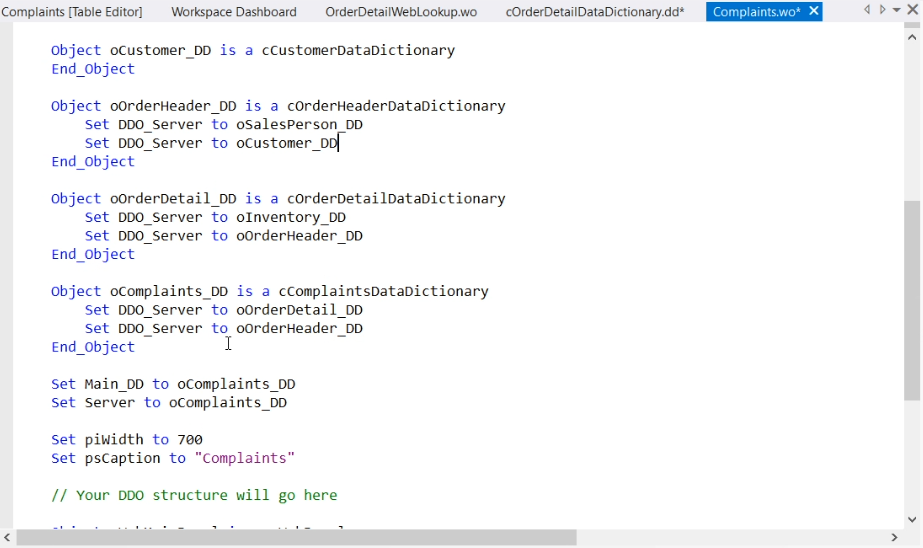
It has the right DDO structure, the main DD is set to OrderDetail. And there is a webPromptList, which is the actual list that is invoked by clicking on the prompt.
Now I go to the Data Dictionary of OrderDetail and for the column Detail_Number, the web lookup object has now been set. The wizard did that.
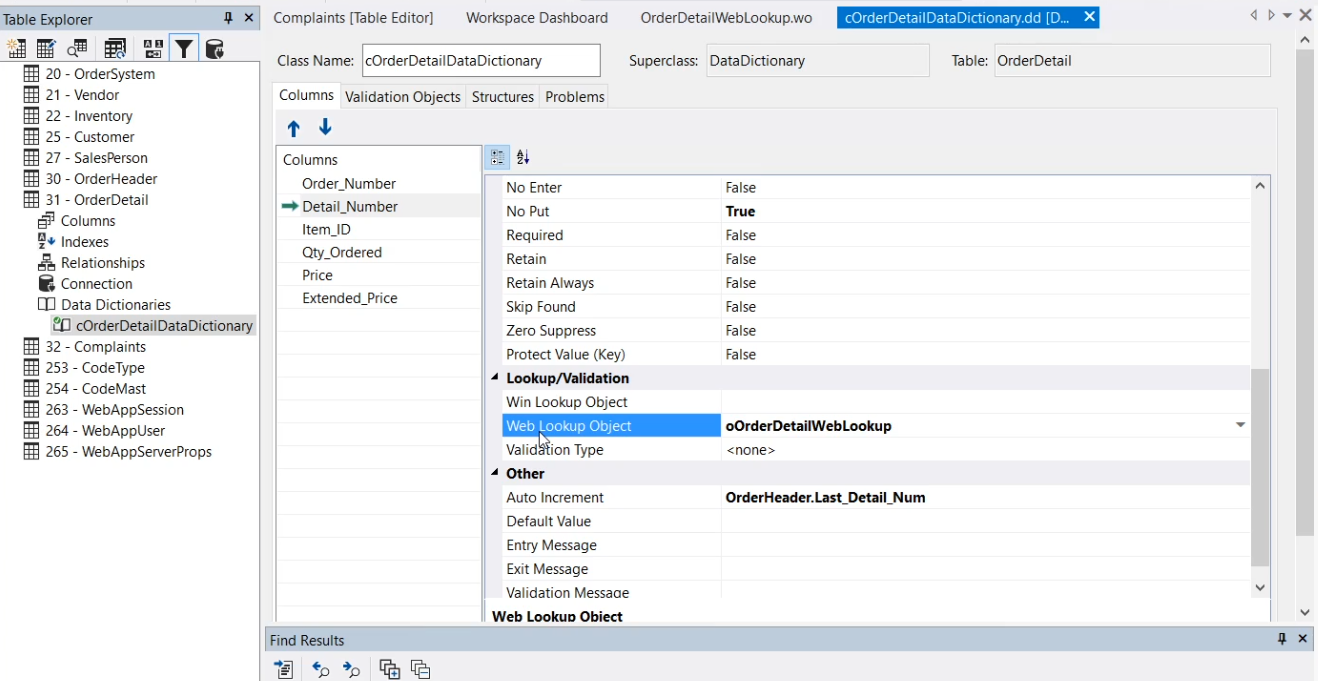
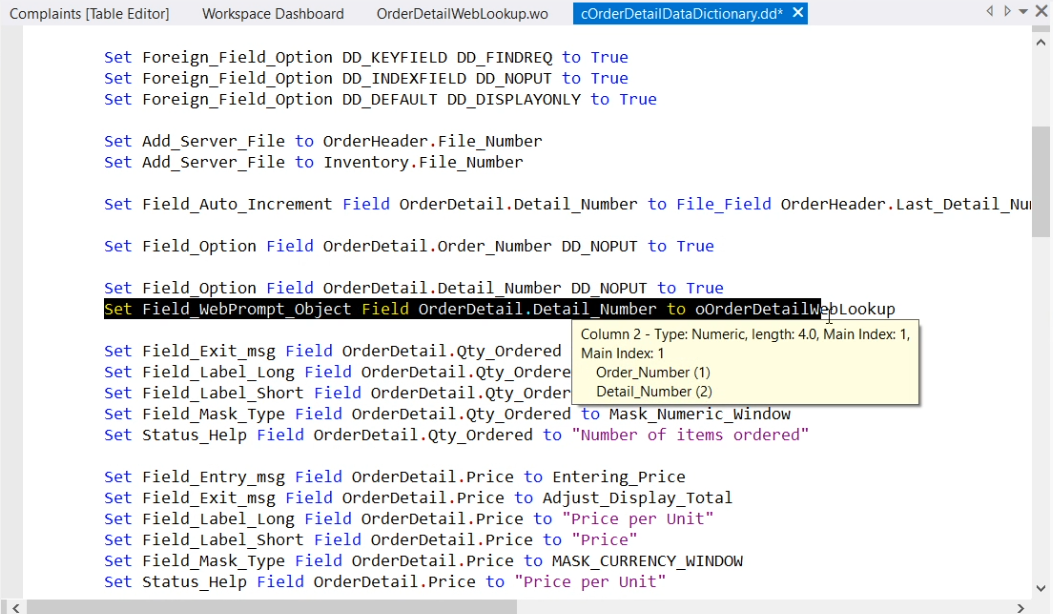
Here is the code. It sets the Field_WebPrompt_Object for the Detail_number field to the Web Lookup object. In a Windows component, it would set Field_Prompt_Object.
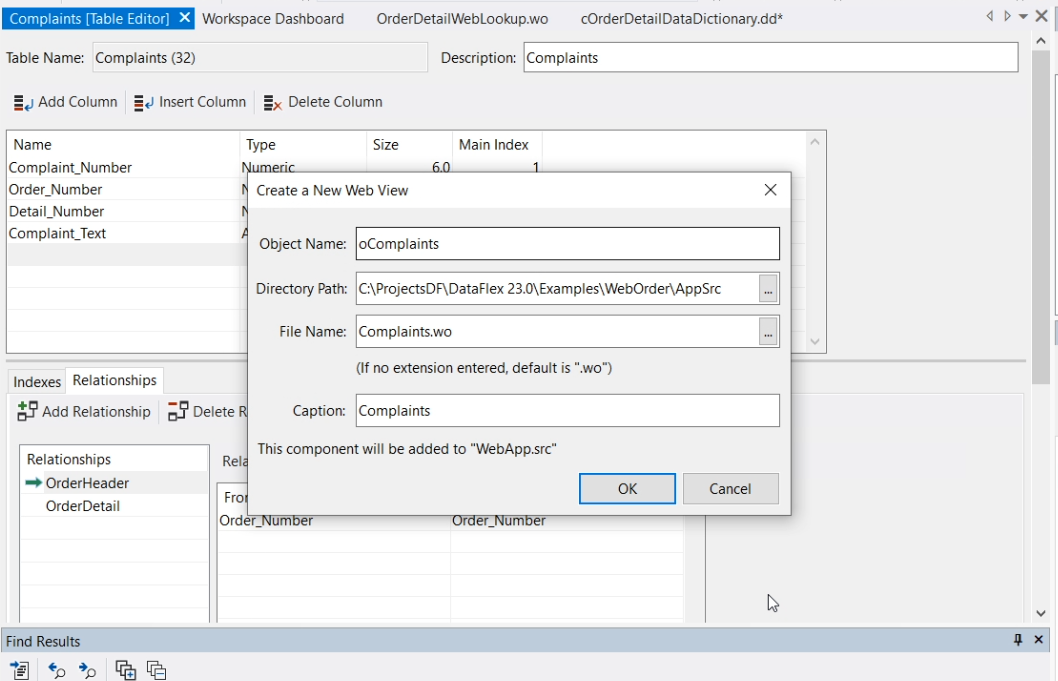
Now, when you put this column on a view component, the prompt button will be added automatically. Let’s create a new web view for the complaints. The complaints table is already there. I go the File -> New -> Web Object -> Web view. I name it oComplaints and click OK.
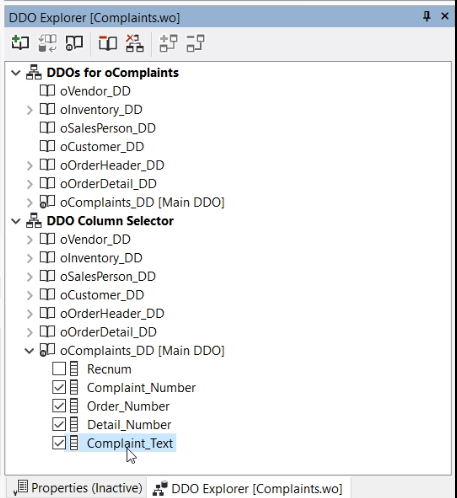
I open the DDO Explorer and click in the DDO Explorer menu to add a DDO structure.
I simply select the Complaint DD and click OK. It generates a rather complex DDO structure because of the parent and grandparents tables that are connected to the Complaints table.
Now in the DDO Explorer I go to the Complaint DD and select the columns I want to show on the view and then drag them to the code.
Remove label1. Press F7 to view the designer. It’s good enough for now.
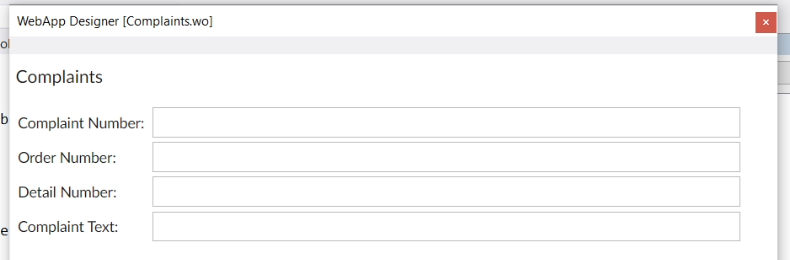
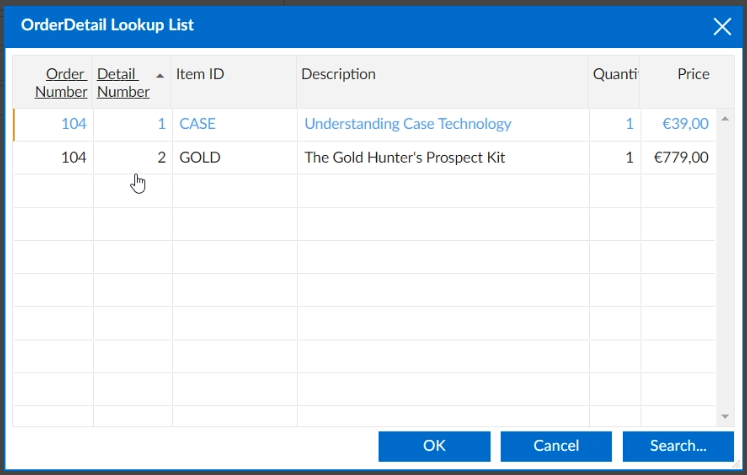
I compile and run. I go to Views > Complaints, and there is the new web view where the user can enter a complaint. You see that both the Order_Number and Detail_Number now have a prompt to go to its selection list.
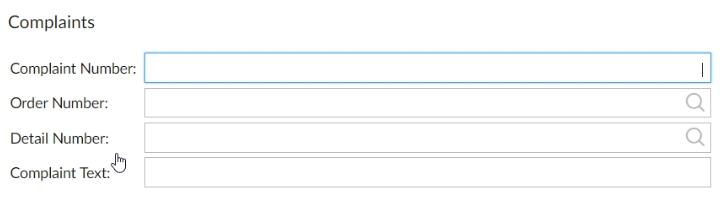
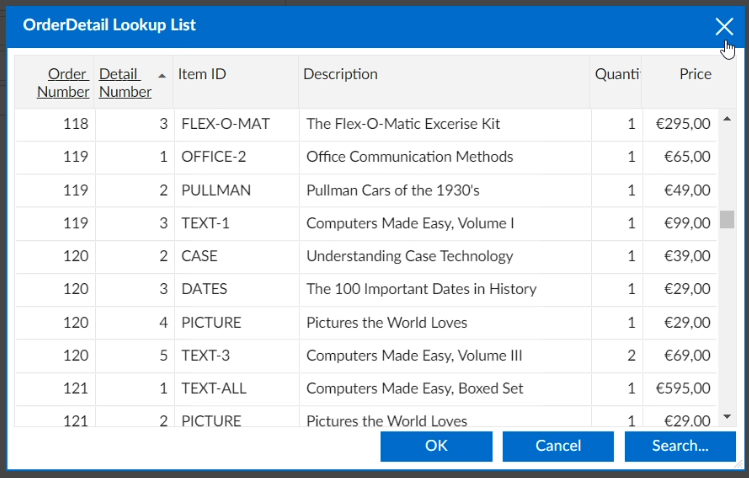
The one for Order_Number was already there. Let me click on it and select order 104. Now I click on the Detail_Number. You’d perhaps expect that it would only show Order_Detail records of Order 104, but instead, it shows them all.
To fix that, we have to do a couple of things.
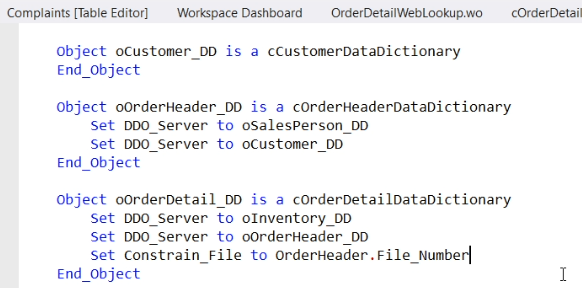
First, in the Complaint view, we have created a DDO structure for Complaint being the main_DD, but the relationship between two of its parents is not set. Therefore, I add a constrain_file in the OrderDetail DDO to the OrderHeader record.
Set Constrain_File to OrderHeader.File_Number
I’ll tell more about Constrain_File and filters in lesson 12.
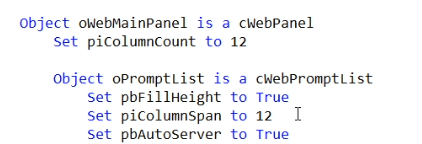
Also in the web Lookup I have to add a line to the WebPromptList to determine that the current object uses the DDO constraints of the invoking object.
Set pbAutoServer to True
If I now run it, the order_detail lookup is aware of the already selected order header record.
Although this is not a very common way to design a web view, it does show how you can attach a lookup object to a web view and have it constrained on the data of the invoking object.
This example showed how to create a selection list in a web application. And as said, you can do the same thing in a Windows application.
Since the prompt and the selection list are connected via the Data Dictionary, all web views and other components that use this column will get the prompt to open a selection list. If you don’t want that for a particular component, you can reset the Field_WebPrompt_Object to zero.
Object oCustomer_DDO Is A cCustomerDataDictionary
// Removes selectionlist assignment done in the class
Set Field_WebPrompt_Object Field Customer.Name To 0
End_Object
In the next lesson we’ll go into data validation via the Data Dictionaries.
