- Open WebMsgBuilder.js from within the text editor
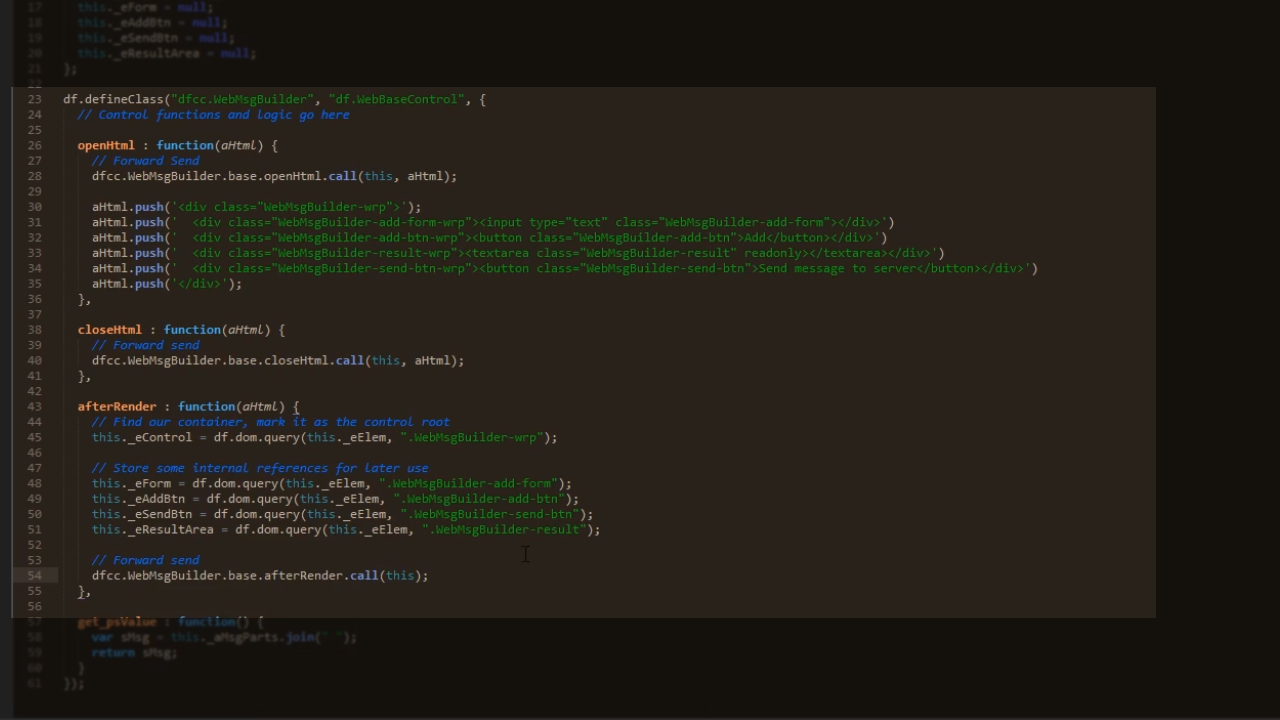
- Add the openHtml, closeHtml, and afterRender functions
//Control functions and logic go here
openHtml : function(aHtml) {
// Forward Send
dfcc.WebMsgBuilder.base.openHtml.call(this, aHtml);
aHtml.push(‘<div class=”WebMsgBuilding-wrp”>’);
aHtml.push(‘<div class=”WebMsgBuilding-add-form-wrp”><input type=”text” class=”WebMsgBuilder-add-form”></div>’);
aHtml.push(‘<div class=”WebMsgBuilding-add-btn-wrp”><button class=”WebMsgBuilder=add=btn”>Add</button></div>’);
aHtml.push(‘<div class=”WebMsgBuilding-MebMsgBuilder-result-wrp”><textarea class=”WebMsgBuilder-result” readonly></textarea></div>’);
aHtml.push(‘<div class=”WebMsgBuilder-send-btn-wrp”><button class=”WebMsgBuilder-send-btn”>Send message to server</button></div>’);
aHtml.push(‘</div>’);
},
closeHtml : function(aHtml) {
//Forward send
dfcc.WebMsgBuilder.base.closeHtml.call(this, aHtml);
},
afterRender : function () {
//Find our container, mark it as the control root
this._eControl = df.dom.query(this._eElem, “.WebMsgBuilder-wrp”);
//Store some internal references for later use
this._eForm = df.dom.query(this._eElem, “.WebMsgBuilder-add-form”);
this._eAddBtn = df.domquery(this._eElem, “WebMsgBuilder-add-btn”);
this._eSendBtn = df.dom.query(this._eElem, “.WebMsgBuilder-send-btn”);
this._eResultArea = df.dom.query(this._eElem, “.WebMsgBuilder-result”);
//Forward send
dfcc.WebMsgBuilder.base.afterRender.call(this);
},
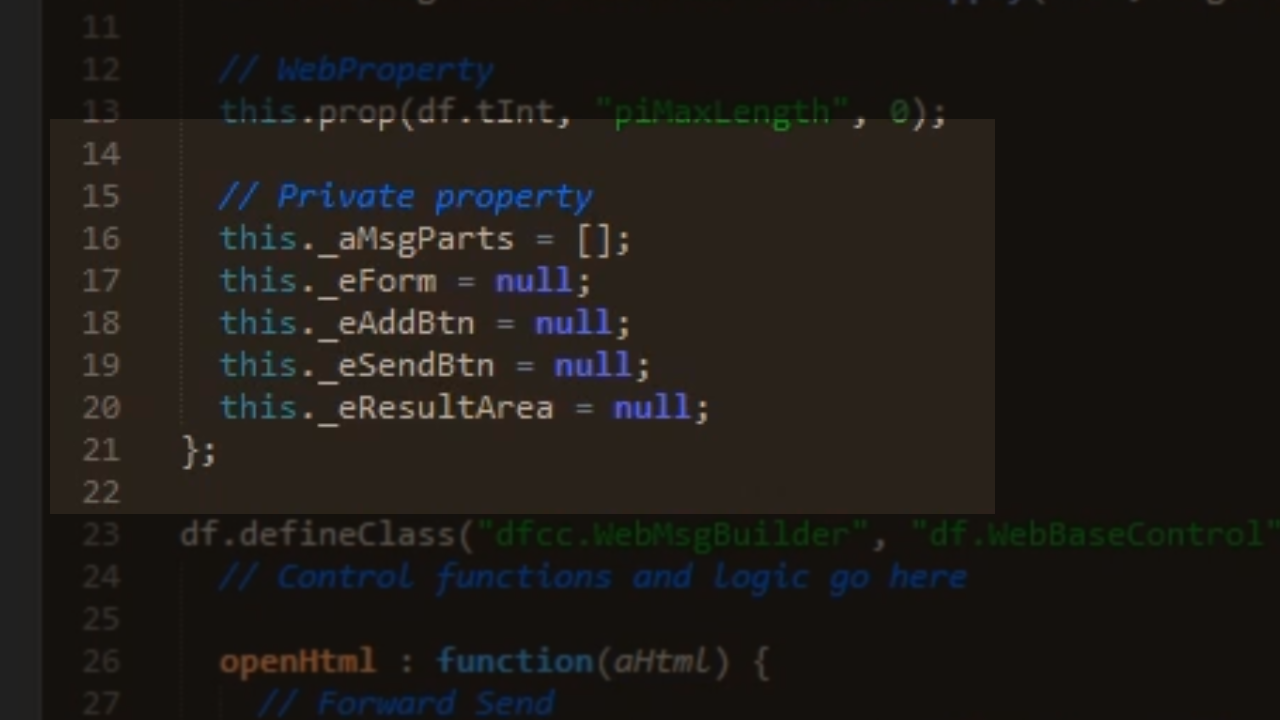
- Add references that are to be stored
//Private property
this._aMsgParts = [];
this._eForm = null;
this._eAddBtn = null;
this._eSendBtn = null;
this._eResultArea = null;
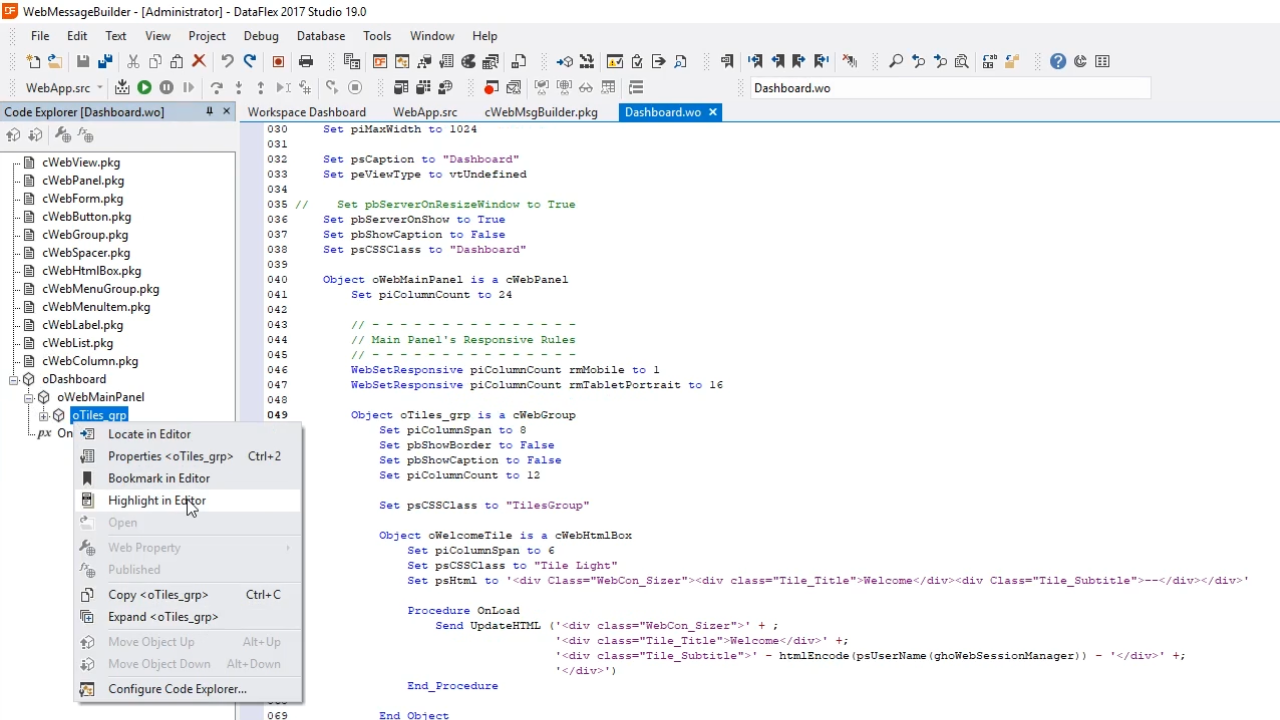
- To add the control to the workspace go to Dashboard.wo in the DataFlex Studio
- First, clean the code. Open the ‘Code Explorer’ in the left panel
- Expand ‘oDashboard’
- Expand ‘oWebMainPanel’
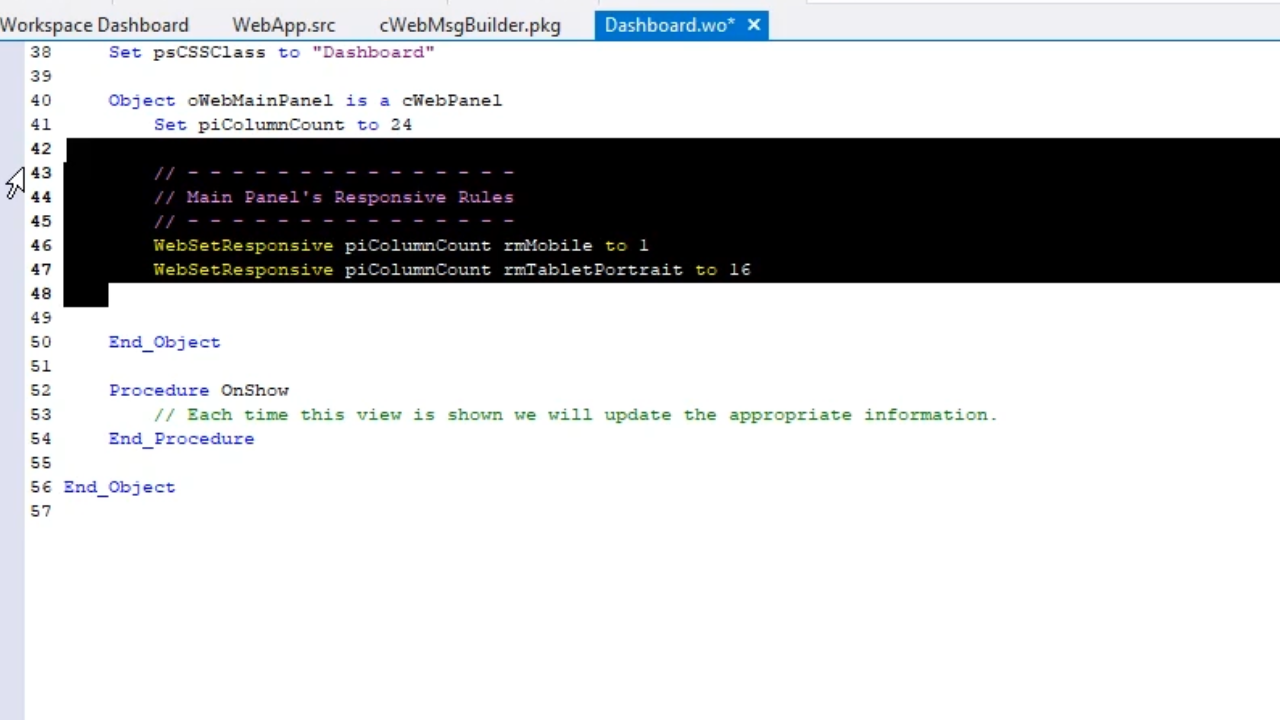
- Select and right click on ‘oTiles_grp,’ select ‘Highlight in Editor,’ and press ‘Delete’
- Highlight the ‘Responsive Rules’ section in the editor and delete it.
- Add the control to the Class Palette
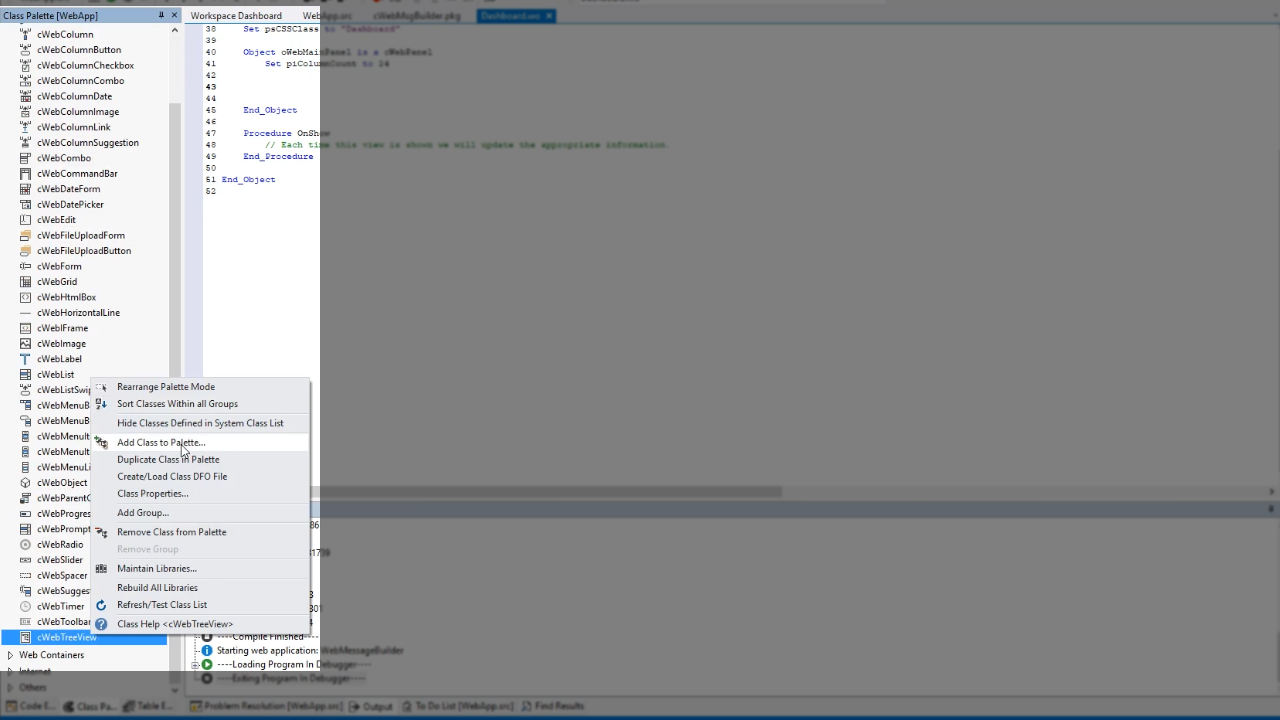
- Open the ‘Class Palette’ in the left panel
- Right click anywhere, and select ‘Add Class to Palette…’
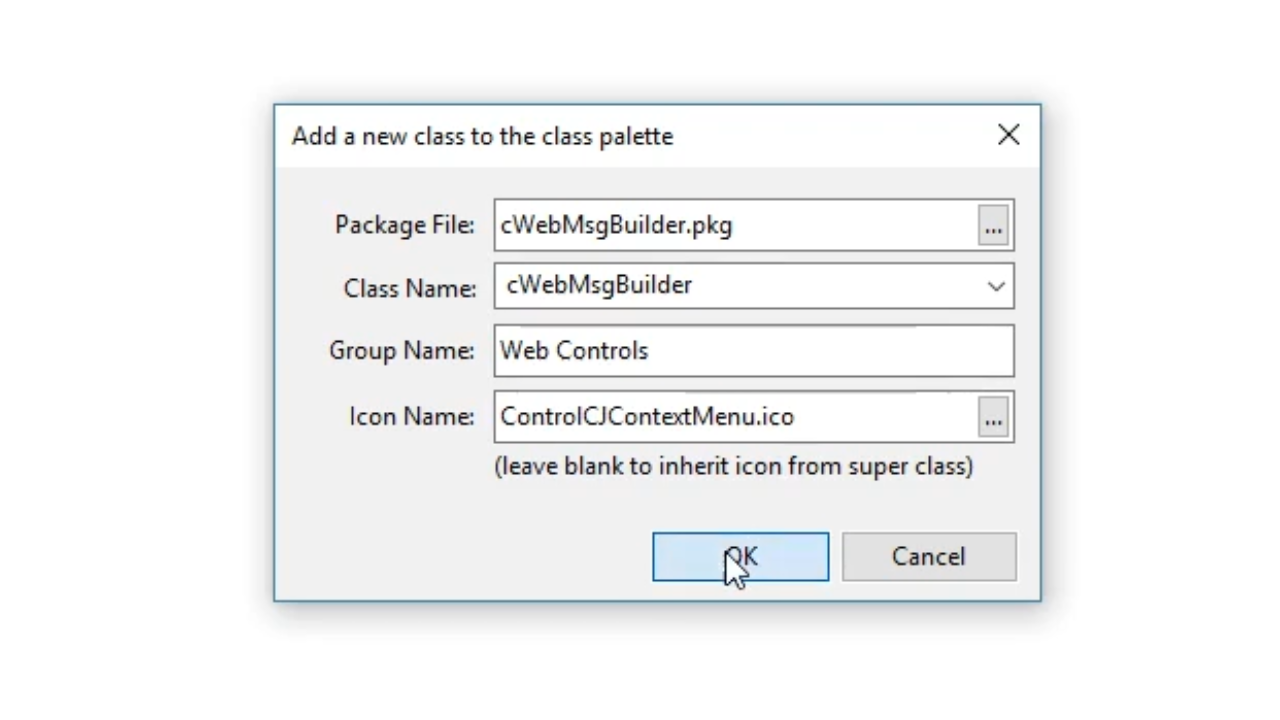
- From the window that appears, expand the options in the ‘Package File’ field, and select ‘cWebMsgBuilder.pkg’ from the the ‘AppSrc’ directory
- Expand the options in the ‘Icon Name’ field, and select ‘ControlCJContextMenu.ico,’ and press OK.
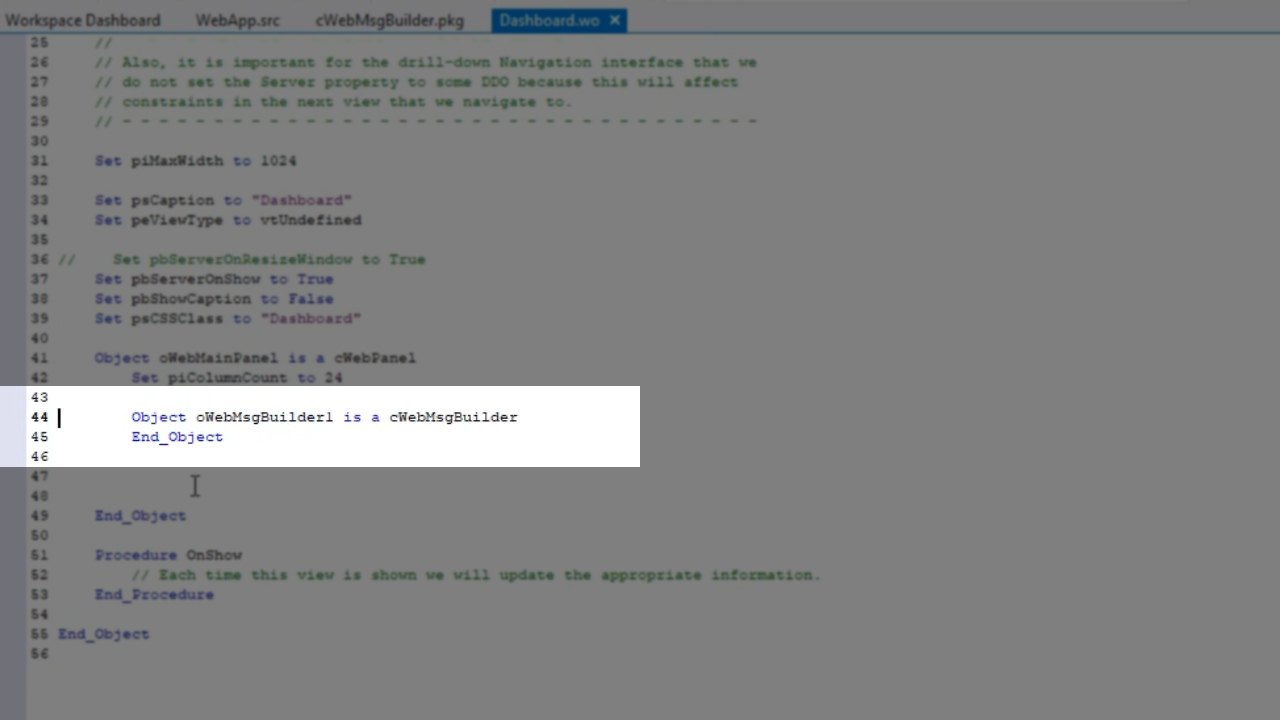
- From the Class Palette select, drag and drop ‘cWebMsgBuilder’ onto ‘Dashboard.wo’
- Press CTRL + 2 to open the object’s properties in the ‘Properties’ panel on the right
- Change ‘piMaxLenght’ to “10” to make it so the message can be a maximum of 10 characters long

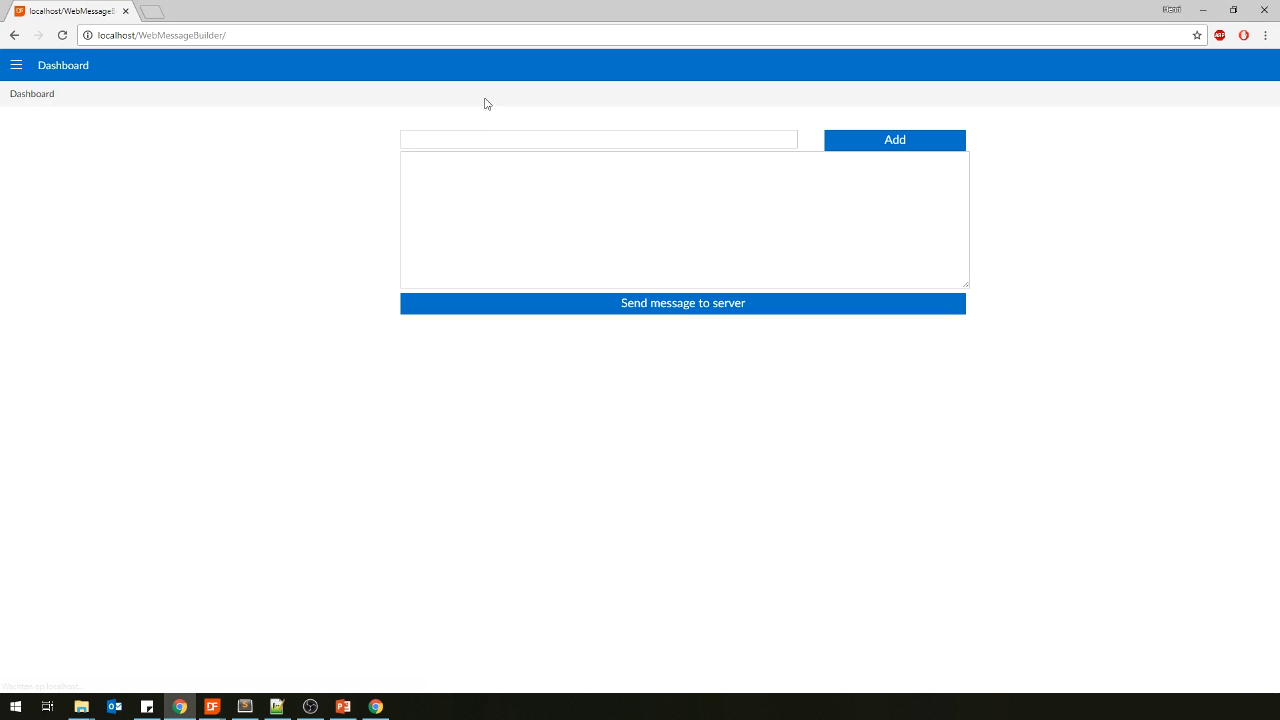
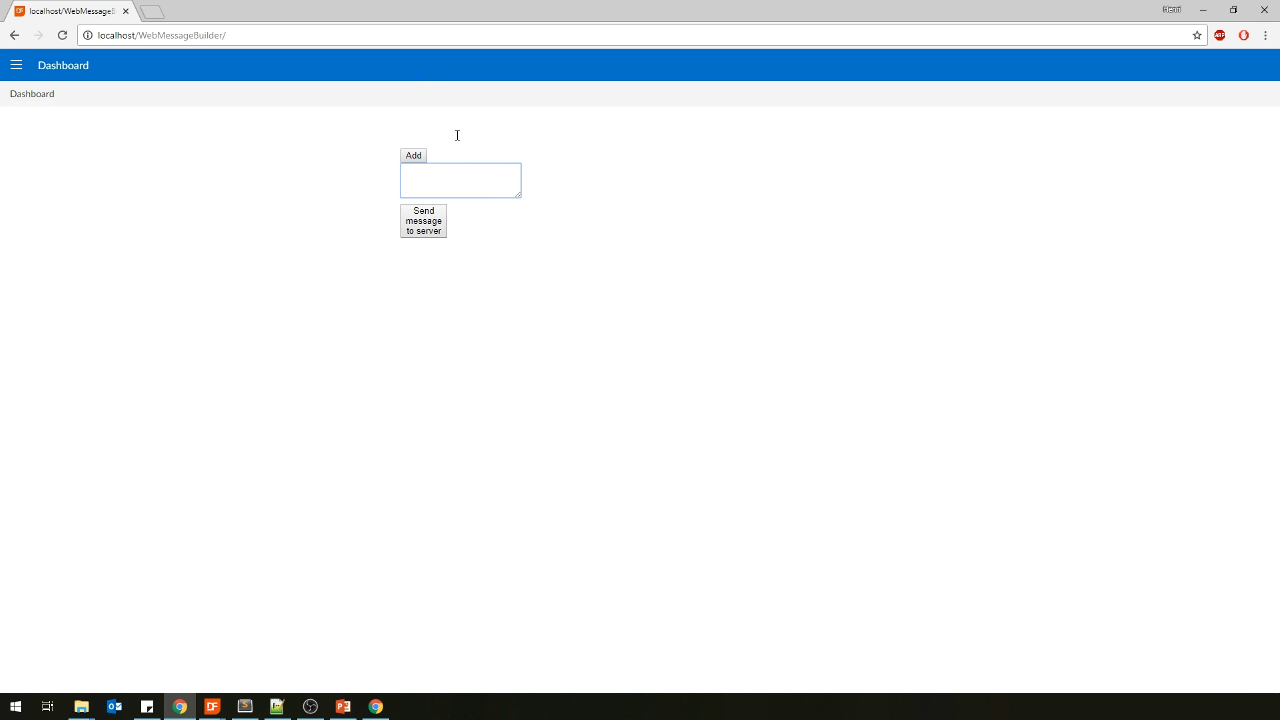
- Select the run icon from the top toolbar.
- Open a web browser, enter the web applications location, and login (admin, admin)
- Localhost/WebMessageBuilder/ is used for the demonstration
- The two fields and buttons are shown in their raw, un-styled format
- Add CSS to the control
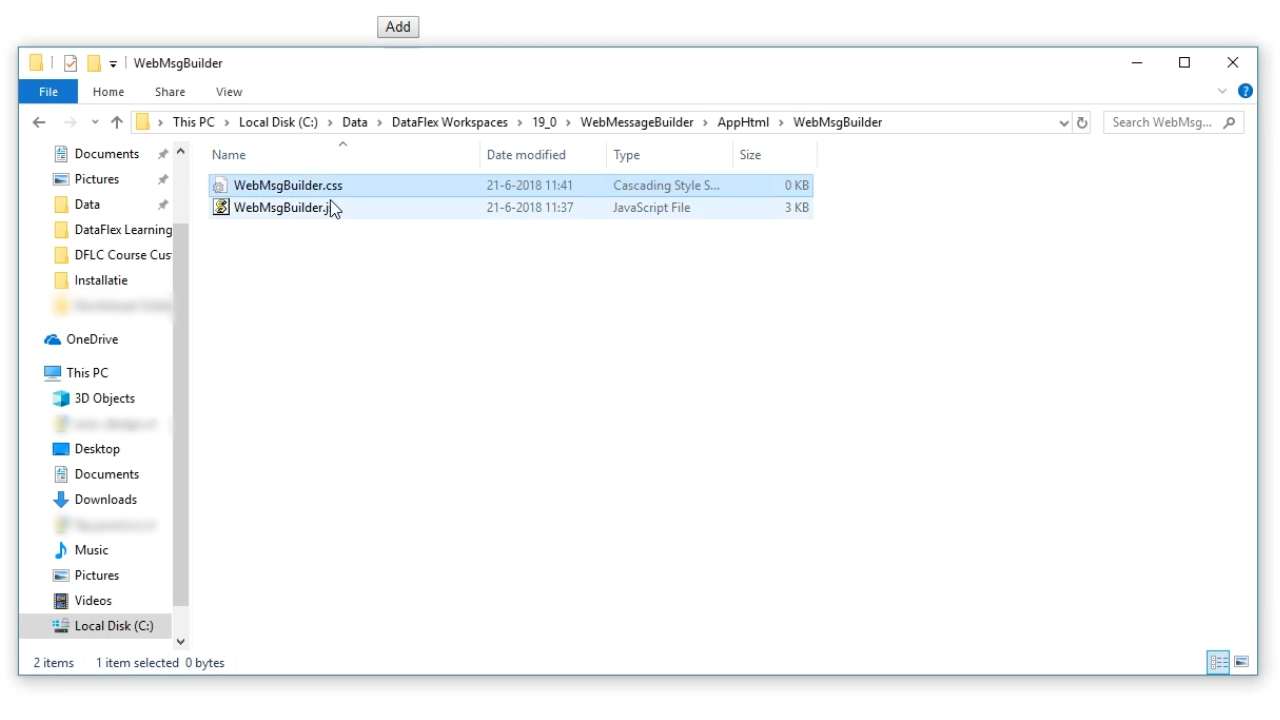
- From the file explorer, navigate to the AppHtml folder
- Select the ‘WebMsgBuilder’ directory
- Right click from within the directory, select ‘New,’ and select ‘Text Document’
- Name the new document ‘WebMsgBuilder.css’
- Open the new CSS document in the text editor
- Paste in CSS code to style the buttons and fields
afterRender : function() {
// Find our container, mark it as the control root
this._eControl = df.dom.query(this._eElem, ".WebMsgBuilder-wrp");
// Store some internal references for later use
this._eForm = df.dom.query(this._eElem, ".WebMsgBuilder-add-form");
this._eAddBtn = df.dom.query(this._eElem, ".WebMsgBuilder-add-btn");
this._eSendBtn = df.dom.query(this._eElem, ".WebMsgBuilder-send-btn");
this._eResultArea = df.dom.query(this._eElem, ".WebMsgBuilder-result");
// Forward send
dfcc.WebMsgBuilder.base.afterRender.call(this);
},
- To use the CSS file it needs to be added to Index.html
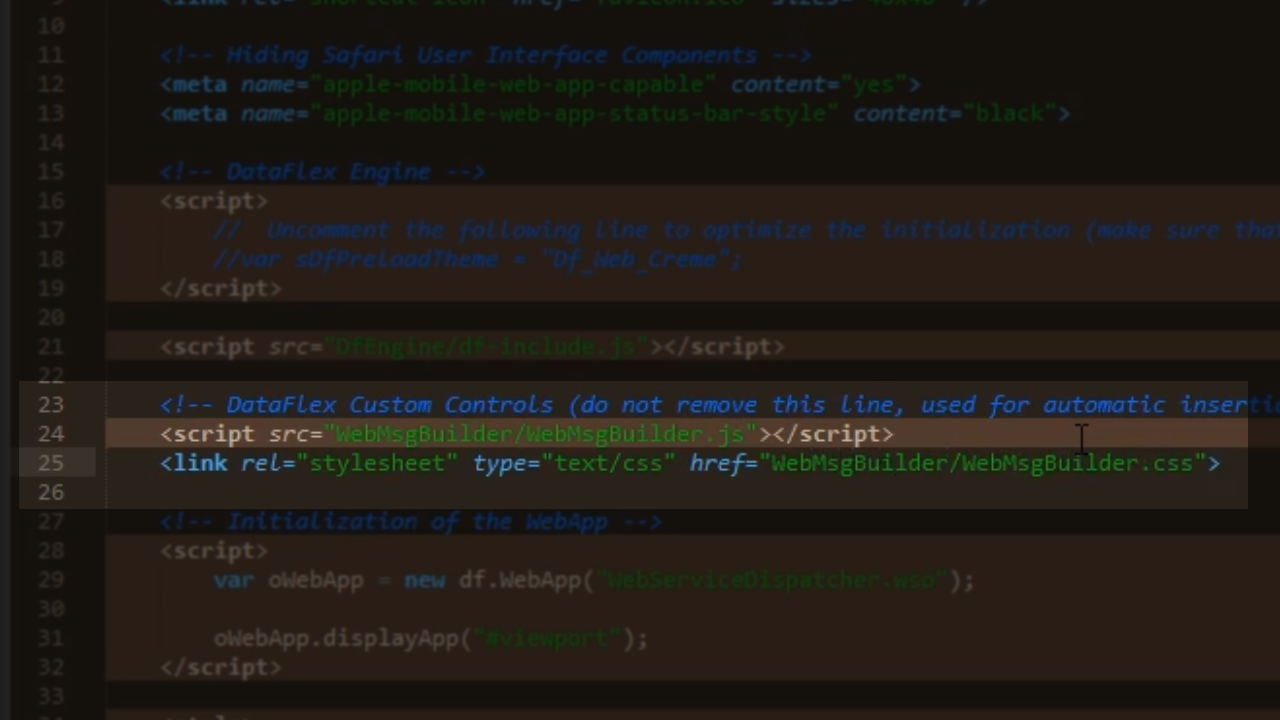
- Open Index.html in the text editor
- Add a new tag to point to the CSS file
<link rel=”stylesheet” type=”text/css” href=”WebMsgBuilder/WebMsgBuilder.css”>
- Refreshing the code in the browser shows that the spacing needs to be adjusted
- Open Dashboard.wo in the Studio, and add the code.
- Select the run icon from the top toolbar to recompile.
- Refresh the browser session to see the changes implemented with the CSS.